Setting up and updating your property's pricing in Travelnest
When creating your Property Listing on Travelnest, adding pricing is essential — without it, your property cannot be listed across over 30 top booking sites.
This guide explains how to set up your pricing for the first time, how to update existing pricing when changes are needed, and how to make the most of Smart Pricing. Once pricing is in place, your calendar will automatically become available for guests to book.
Good to know
- Your property can’t go live on booking sites until you’ve added pricing.
- Booking sites recommend having at least 12 months of pricing available at all times.
- To appear in more searches, allow guests to check in on as many days as possible.
- Your property will be bookable for all pricing periods you add to your Travelnest account.
- If the property is unavailable for certain dates, make sure to block these in your calendar. For more information on blocking your calendar, see our article here.
- If you ask us to cancel bookings for unblocked dates, a £160 + VAT cancellation fee applies.
Our pricing model
At Travelnest, we use nightly pricing, which means you set a specific rate for each night of the week in the Pricing and discounts section of your property’s dashboard. We also support pricing periods — these are defined date ranges (for example, 1 January 2026 to 31 January 2026) within which a consistent pricing structure applies.
If you choose to use Smart Pricing, the same nightly pricing model still applies — Smart Pricing simply automates rate adjustments based on market demand and trends.
Once your pricing is set, your property will be ready to receive bookings.
Our system does not use occupancy-based pricing. The rate you set applies per night for the accommodation, regardless of how many guests stay. There is no option to charge extra for additional guests.
How to set up pricing automatically
To save time and ensure competitive rates, we recommend enabling Smart Pricing.
This dynamic and data driven tool automatically sets your nightly rates for the next 365 days based on local market trends. Smart Pricing helps you maximise revenue and can increase earnings by up to 60%.
To learn more and activate this feature, see our Smart Pricing guide.
How to set up pricing manually
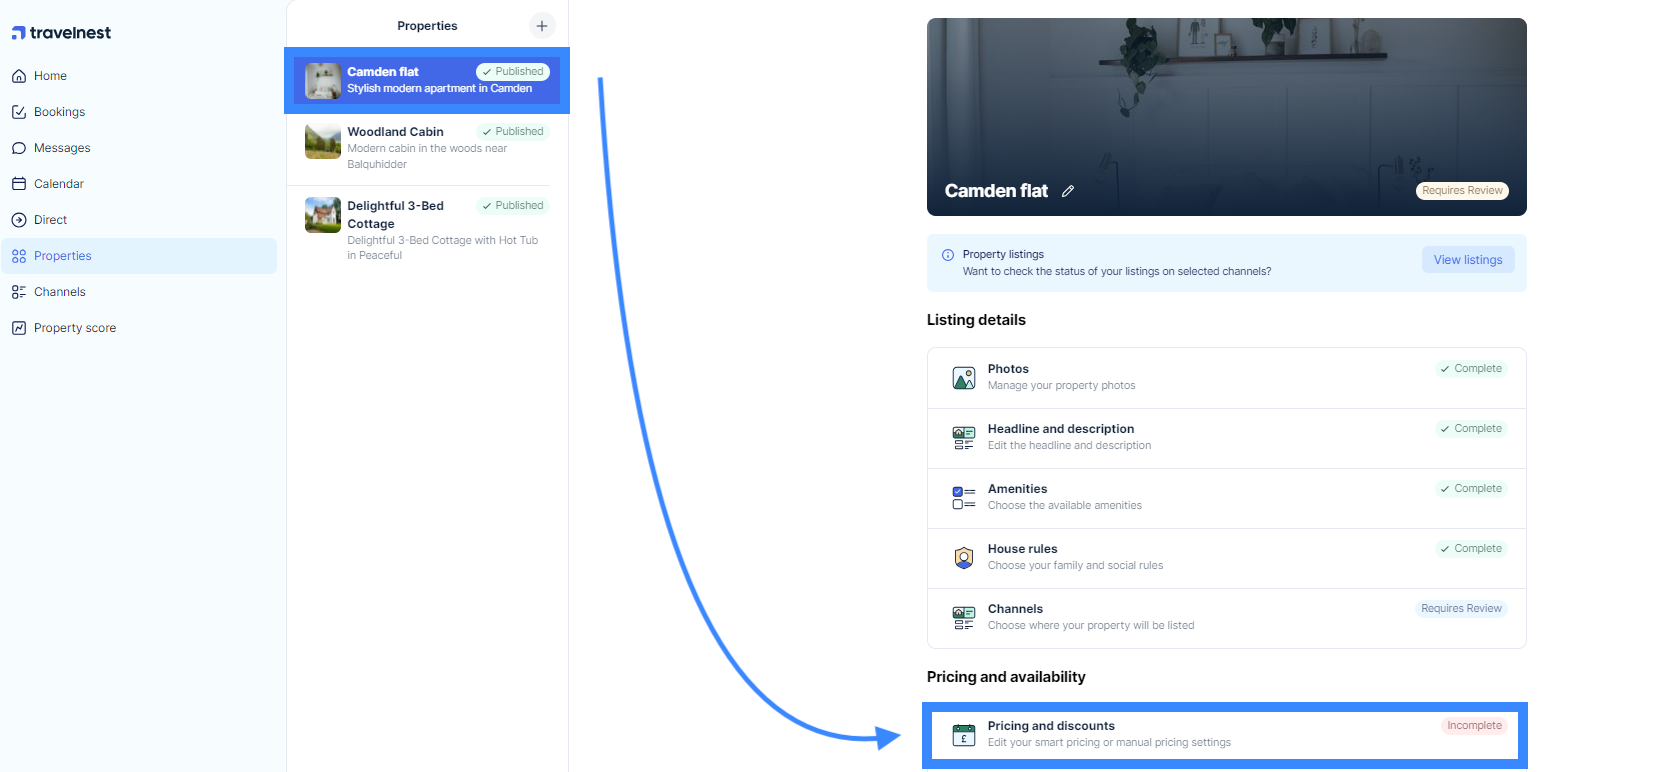
- Log in to your Travelnest account: From your homepage, select the property you’d like to add pricing for, then click Pricing and discounts on the right-hand side.
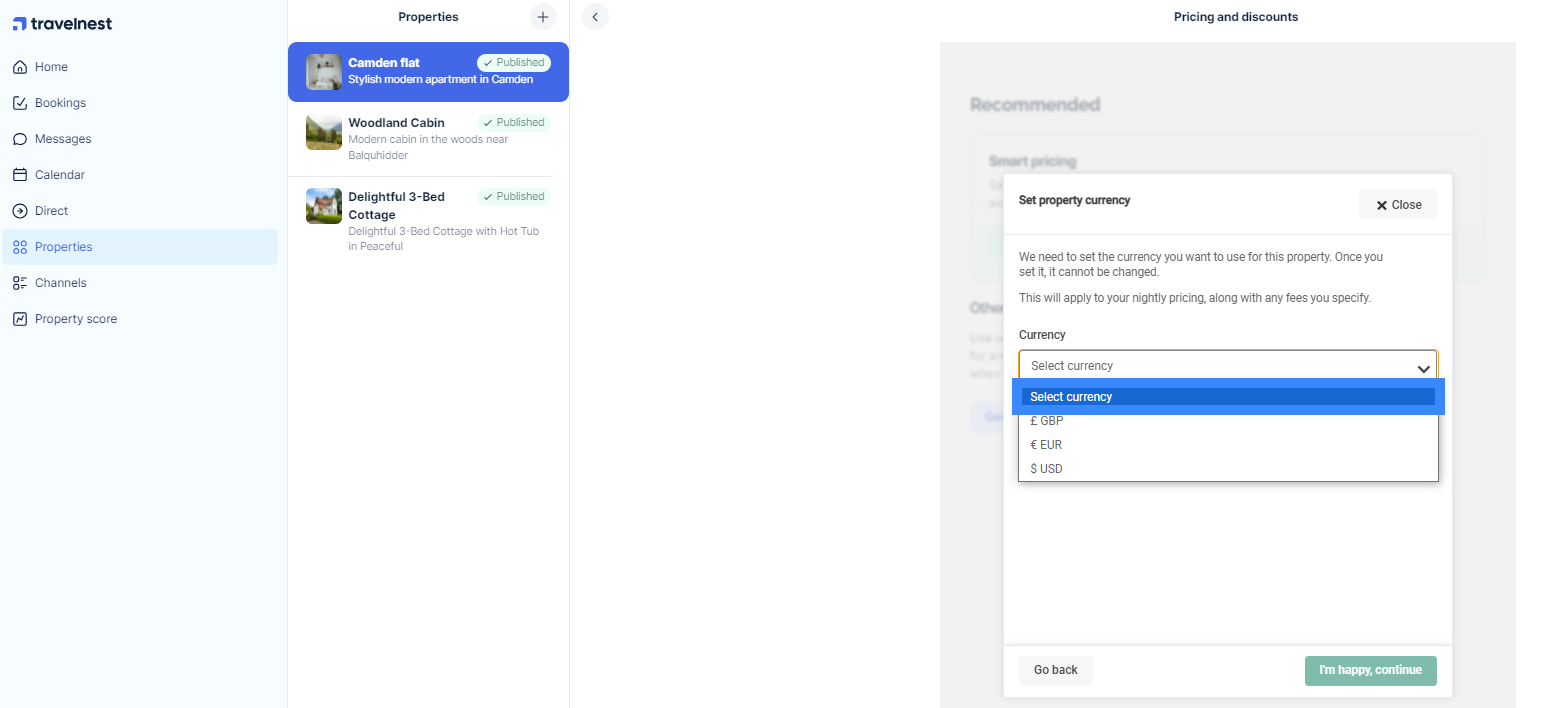
- Select your currency: Choose the currency you’d like to use, then click I’m happy, continue.
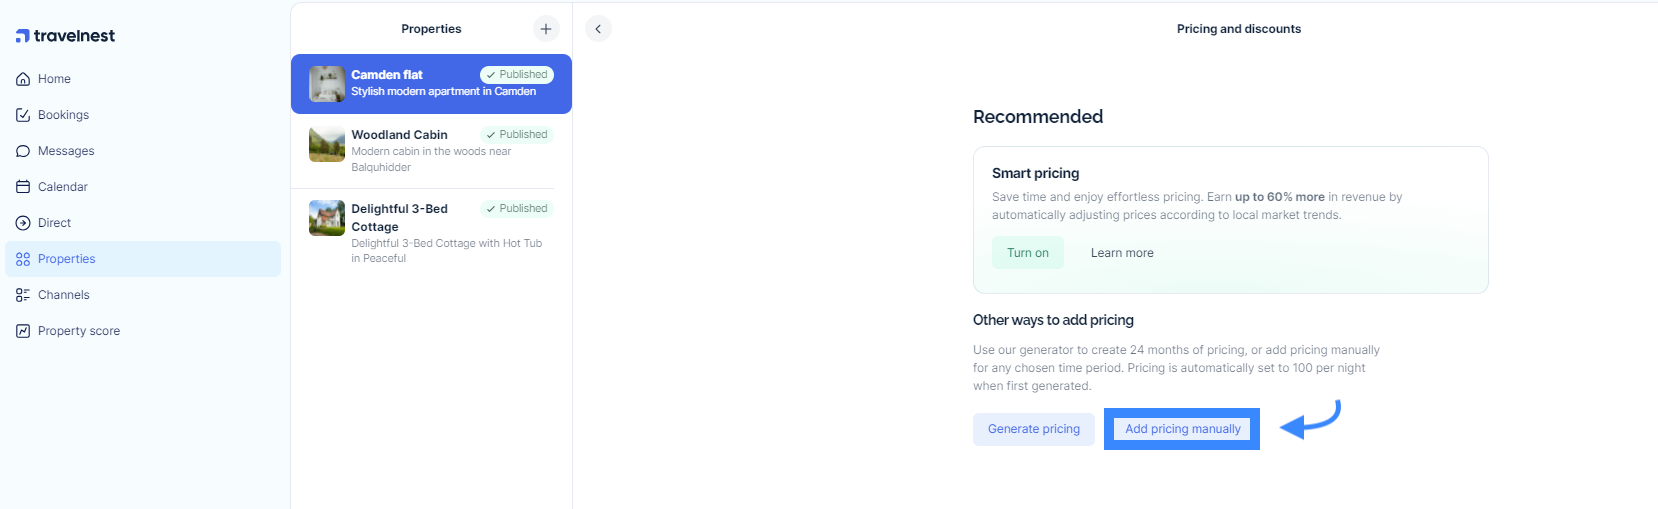
- Choose Add pricing manually: On the next page, you’ll see options for Smart Pricing, the generator tool, or manual pricing. Select Add pricing manually.
- Add pricing periods by month or week: Set up your pricing periods by naming each one for easy reference, such as holiday rates or off-peak season. Then, choose the start and end dates for each period to define when the pricing will apply.
- Select arrival days: Select the arrival days for your guests by choosing which days they can check in. Days highlighted in blue are available for arrivals, and you can deselect any day when guests should not be able to arrive. For example, if you deselect Tuesday, guests will not be able to check in on that day.
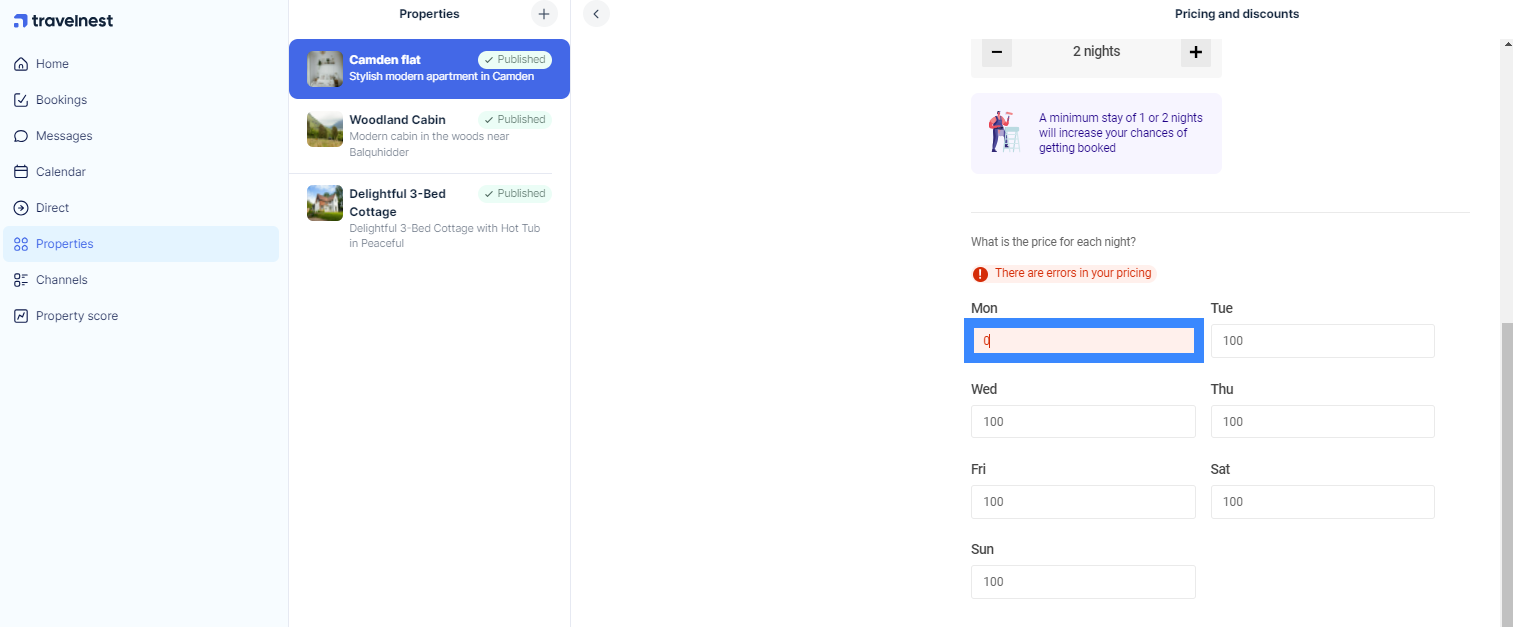
- Set minimum stay requirement: Use the plus (+) or minus (-) buttons to adjust the minimum number of nights.
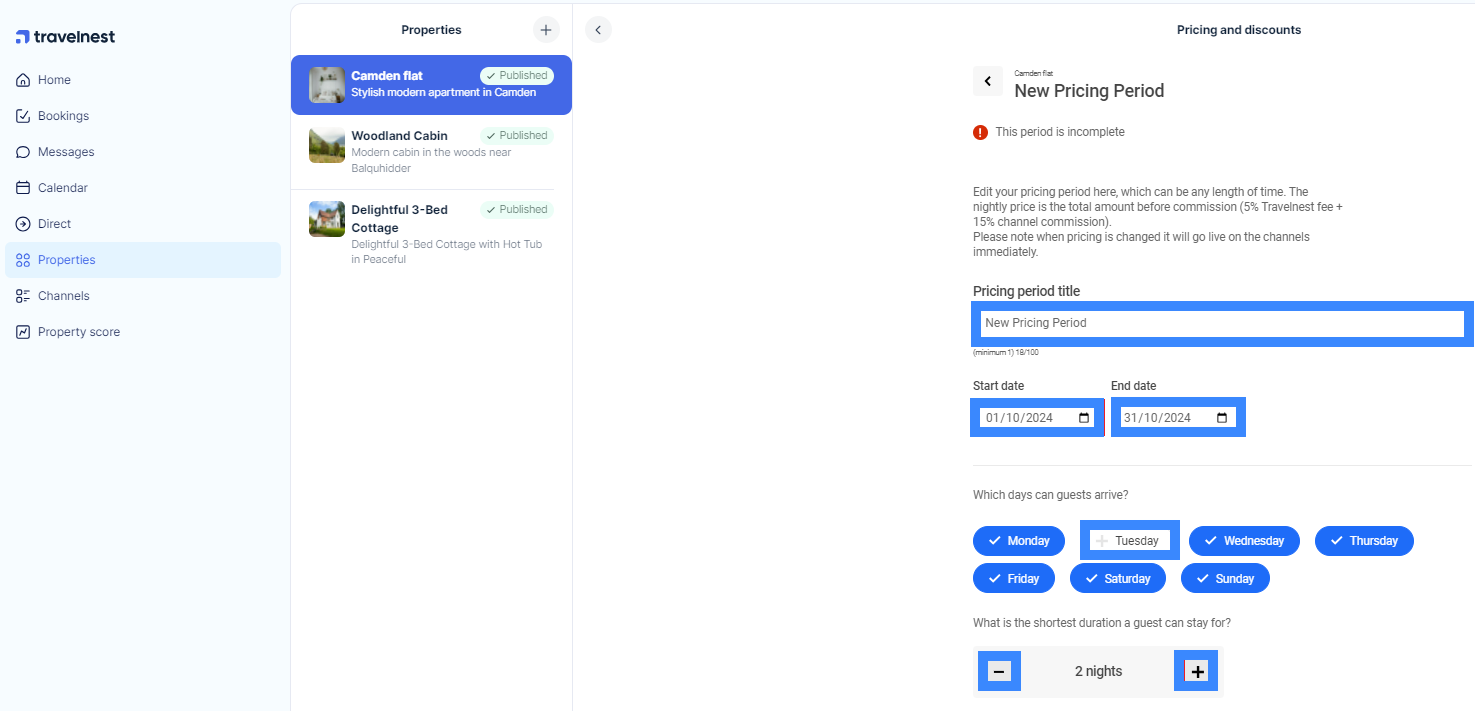
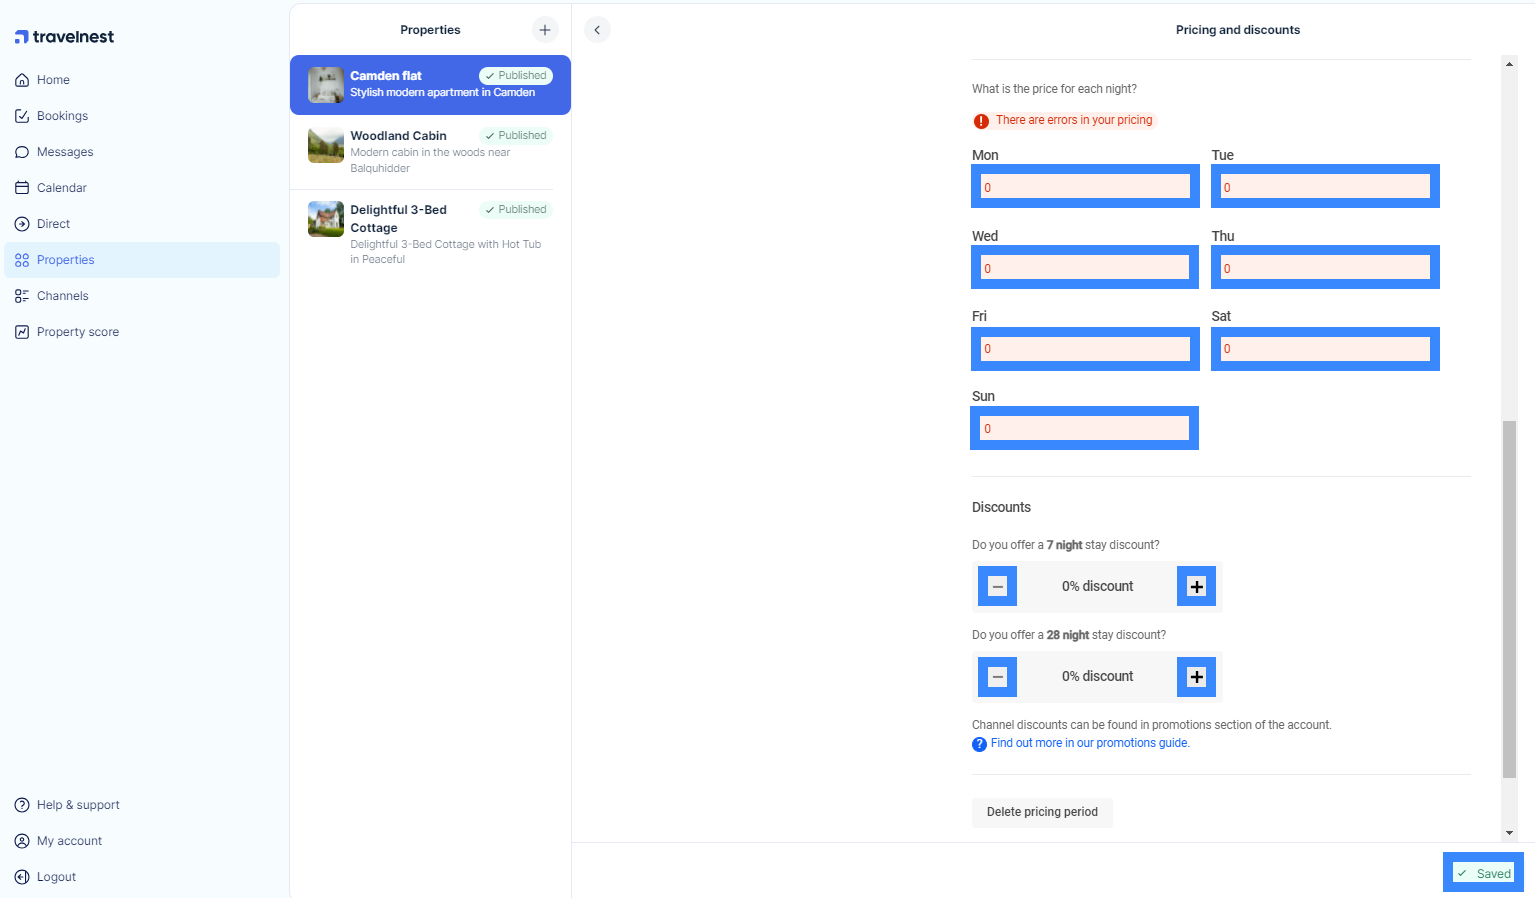
- Add daily rates: Ensure you add rates for every day from Monday to Sunday. This is necessary even if certain days are blocked on your calendar.
- Apply discounts: You have the option to add discounts for stays of 7 or 28 days to encourage longer bookings.
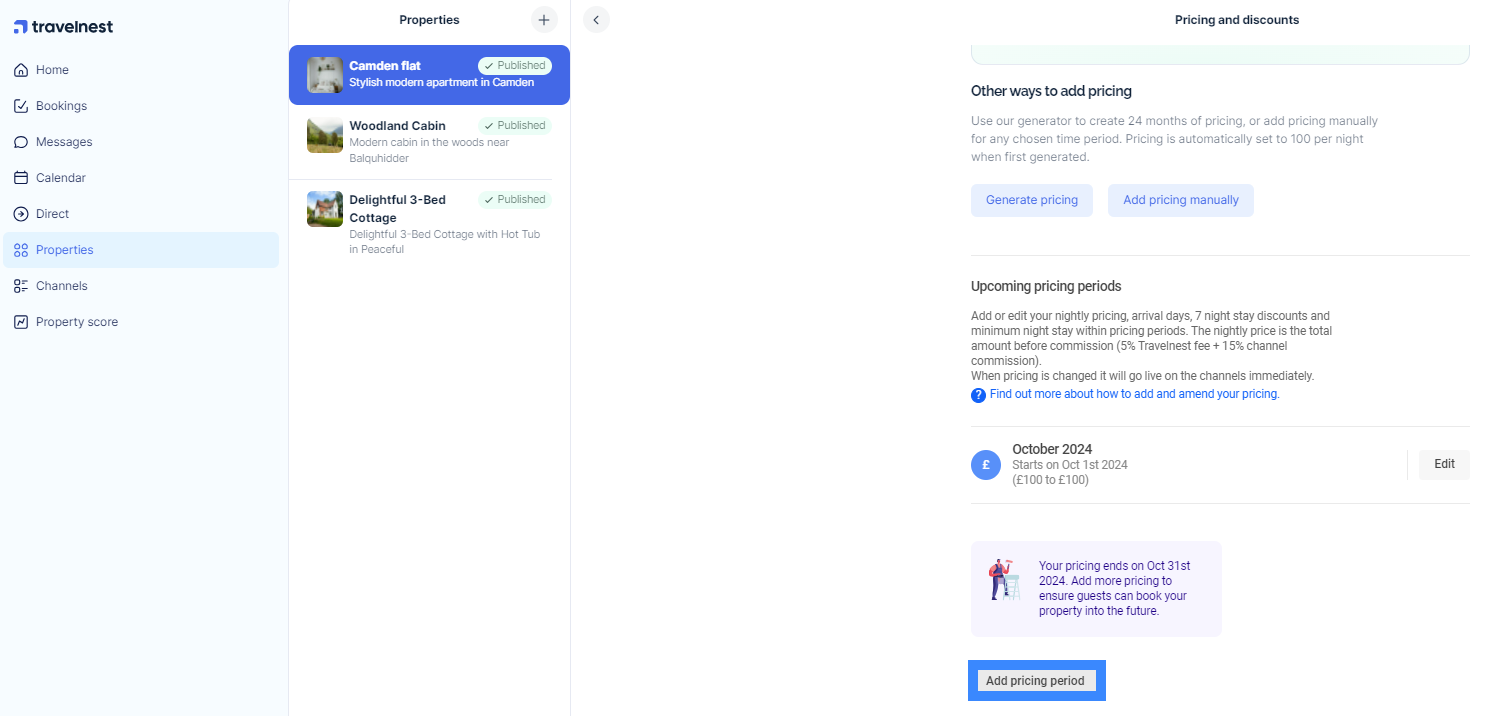
- Save your setup: After entering all your pricing details for each month or week, ideally for the next six to twelve months, click Save at the bottom of the page to secure your setup.
To continue adding pricing for additional months or weeks:
- Go back to the Pricing and discounts main page.
- Select Add pricing period.
- Repeat the steps above.
Manually adding pricing can be time-consuming. We recommend enabling Smart Pricing for automatic, competitive rates.
Editing and amending existing manual pricing periods
Regularly reviewing your pricing helps keep your property competitive. Follow these steps to edit existing manual pricing.
For example, you may want to change your pricing and increase your price per night for specific periods such as the Easter Holidays or over Christmas and New Year.
- Log in to your Travelnest account and choose your property. Click Pricing and discounts on the right-hand side.

- You’ll see all pricing periods you’ve added manually or through the generator tool. To edit, click Edit next to the relevant period.
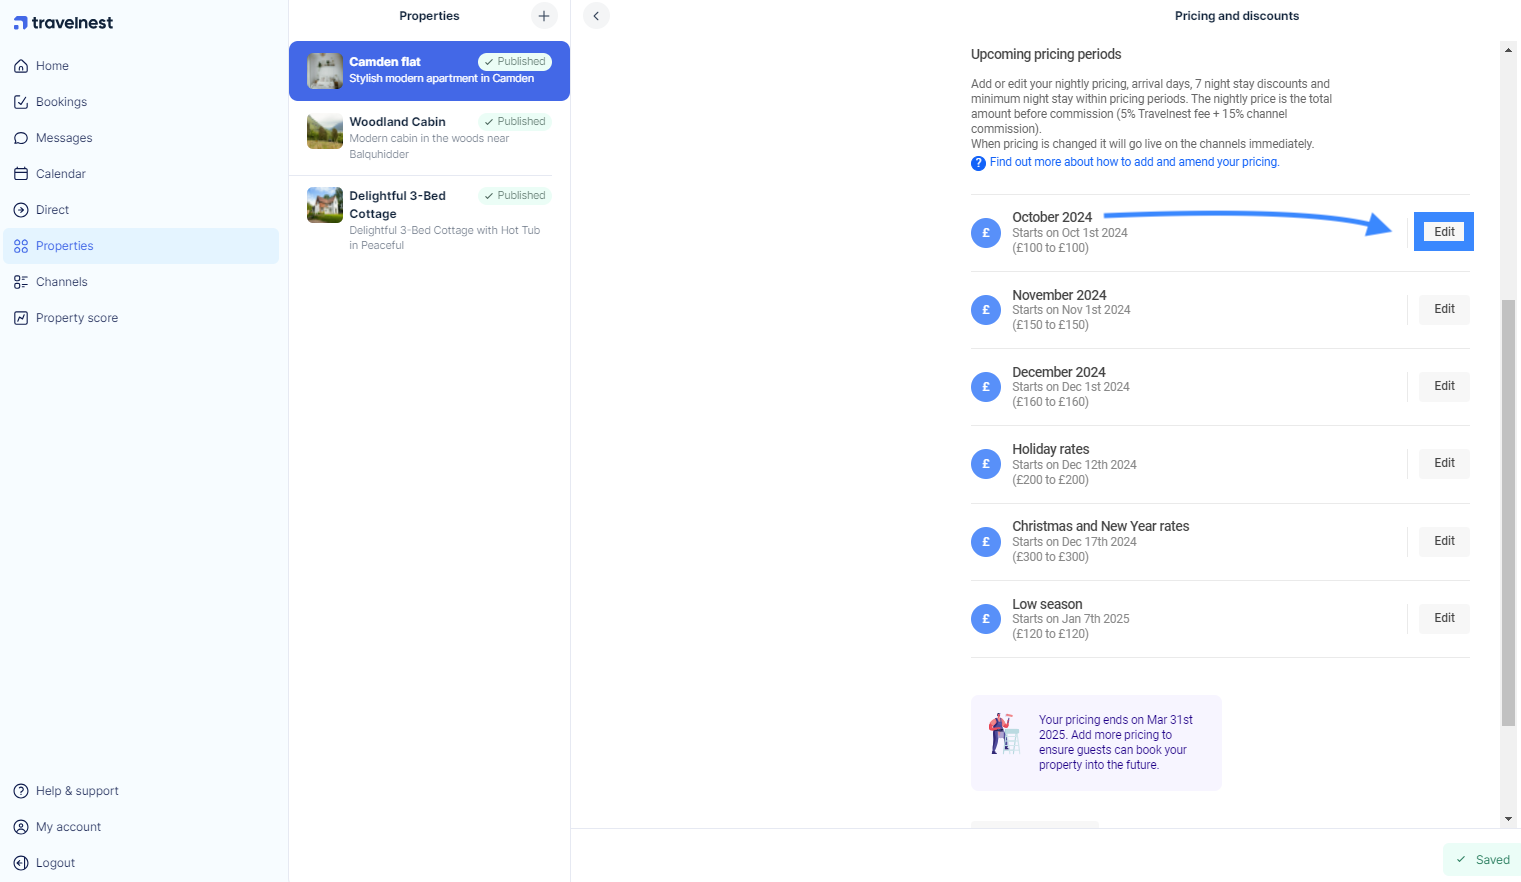
- Update your rates, minimum nights, or discounts as needed, then click Save at the bottom of the page.
Examples of pricing adjustments
Weekend pricing
If you’d like to increase your weekend rates in August, open the pricing period that includes those dates. Adjust the price for Friday, Saturday, and Sunday — changes will save automatically.
Seasonal uplift (Easter or holidays)
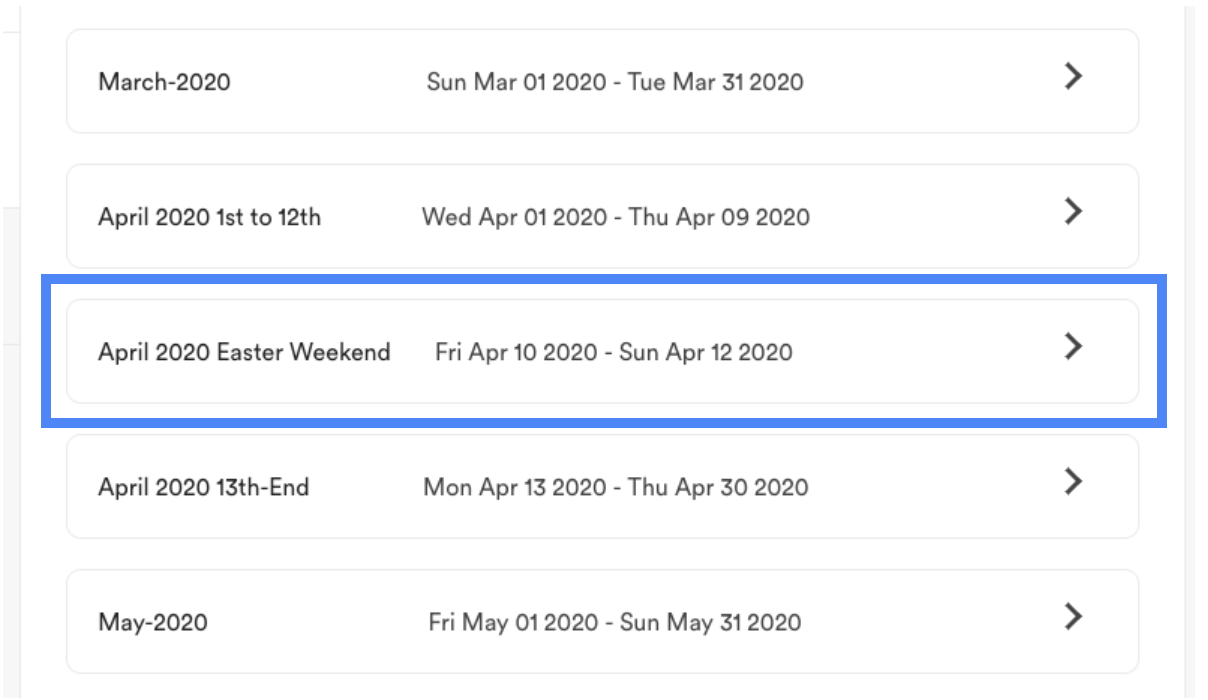
If you already have a full month of pricing but want to increase rates for a specific period (e.g. Easter weekend):
- Edit the existing period to end the day before the uplift begins.
- Create a new pricing period for the uplift dates.
- Add another period after the uplift to return to standard pricing.
Below is an example of how pricing looks before and after a new pricing period has been added to cover the Easter weekend.
Before:

After:
Adding a brand new pricing period
Create a new pricing period, name it, and set start/end dates. Select arrival days, minimum stay, currency (GBP, EUR, or USD), and nightly prices.
Encourage longer stays with discounts
To reward guests for longer stays, you can offer discounts for 7-night or 28-night bookings within any pricing period. At the bottom of the pricing section, under Discounts, enter a percentage value and it will automatically be applied.
Removing a pricing period
To remove a pricing period, simply select the period you wish to delete and click the Delete pricing period button at the bottom of the page. This will remove the period and automatically update your listings.
Optimising your pricing
There are many ways to optimise your pricing throughout the year to increase revenue. See our guide on How to price your property competitively to attract bookings for expert tips.
Setting up pricing by seasonality
Seasonal pricing allows you to maximise your earnings year-round. To learn how to create seasonal pricing periods, see our guide on Setting up seasonal pricing.
Was this article helpful?
That’s Great!
Thank you for your feedback
Sorry! We couldn't be helpful
Thank you for your feedback
Feedback sent
We appreciate your effort and will try to fix the article